|
|
|---|
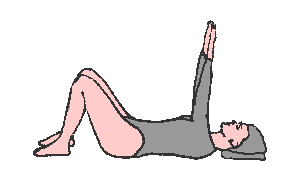
The Wind Mill:- Start Position
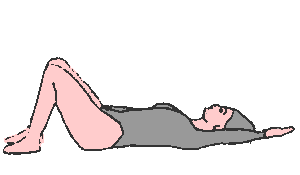
- Start in the Relaxation Position, with arms pointing up to the sky.
- Keep your elbows relaxed and palms facing toward your feet.
- Pelvic neutral.
- Anchored scapulas.
The Wind Mill:- Action
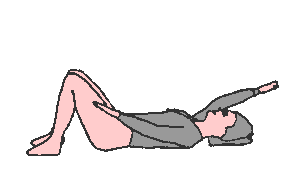
- Breathe in and zip and hollow.
- (Breathing out): The right arm moves backward until it is pointing to the wall behind you.
At the same time, your left arm moves forward until it is pointing to the wall beyond your feet.
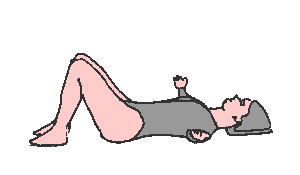
- (Breathing in): Move the arms along the floor in opposite directions until your left arm is pointing behind
you and your right arm is pointing beyond your feet.
- (Breathing out): Lift both arms back up to the start position (pointing up at the sky).
- Repeat three to five times.
© Bruce Thomson, EasyVigour Project
(Scroll right>>>>....)
|
|
What it does
- Encourages healthy scapular rhythm
- Encourages the scapular anchor muscles to function smoothly under minimal load
(lets them "recalibrate").
- Encourages the rotator cuff muscles to function smoothly under minimal load.
Especially, (assuming the scapular anchor is backing them up), they will be stopping the humerus
"slopping" forward or up to impinge on the acromion. (Shoulder impingement is a
very common condition).
Watch Points
- Do not push the arms beyond their comfortable range. They do not have to reach
the floor at any stage.
- Maintain a stable pelvis and torso, and keep those scapulas gently anchored.
Reference
- Shirley A Sahrmann: Diagnosis and Treatment of Movement Impairment Syndromes;
Publ. Mosby 2002
- The Official Body Control Pilates Manual Available from: http://www.bodycontrol.co.uk/
scroll up^^^^.....
|